Have you ever thought of embedding Google Maps on your WordPress blog? Do you think you aren’t skilled enough to do so?
Don’t worry! I am here to help you tackle it. In this article, I will introduce you to a WordPress plugin, using which the integration can be done without getting your hands dirty or your site broken.
So, without further ado, let’s get started.
Embed Google Maps on Your WordPress Blog (Google Maps Widget Review)
First, I will give you an overview of the features of the plugin. Then, you can read how to embed the maps on your site.
Features of Google Maps Widget Plugin
I have been using this plugin for several months now. The following are the enticing features that I found impressive with it.
#1. Mobile Responsive
Being a webmaster, you know Google give preferences to mobile responsive websites. Moreover, you should make your website mobile friendly given that a significant percent of internet consumers use their small screen gadgets to browse.
Google Maps Widget plugin doesn’t create any issue on mobile screens. All the maps generated by it are completely responsive.
#2. Unlimited Maps per Page
Yeah, you heard it right! You can create as many maps as you want.
Unlike any other plugins, it doesn’t impose any limitations on you. All you have to do is installing the plugin, giving the correct location, and grabbing the shortcode (or creating a widget) only.
You can repeat the same process over and over again to embed more and more maps on your site.
#3. Different Map Modes
Google Maps is a complete solution. The tech titan has implemented different features there. Do you think it is impossible for you to bring them all into embed maps?
You are wrong!
Google Maps Widget plugin offers four different modes; directions, view, street, and streetview. You are the supreme authority choosing which one to go with.
#4. Shortcode Support
From the name of this plugin, you can figure out what it offers. Yeah, it provides you with an additional widget. You can’t add a widget in main content area.
That’s why Google Maps Widget supports shortcode. Whenever you create a map, you can grab the shortcode and use it wherever you want to display that particular map.
#5. Google Analytics Support
I am sure you are familiar with Google Analytics. You know what? Google Maps Widget allows you to integrate Analytics. Yeah, you read it right!
By doing so, you will get to know how many people open your map.
#6. Fastest Loading Maps
Most of the Google Maps plugins inject scripts with more than 40 requests into your sites. On the contrary, Google Maps Widget needs only one request to load any map.
As a result, your site will not go slow.
How to Painlessly Embed Google Maps on Your WordPress Blog?
Follow the steps given below to embed Google Maps on your widget.
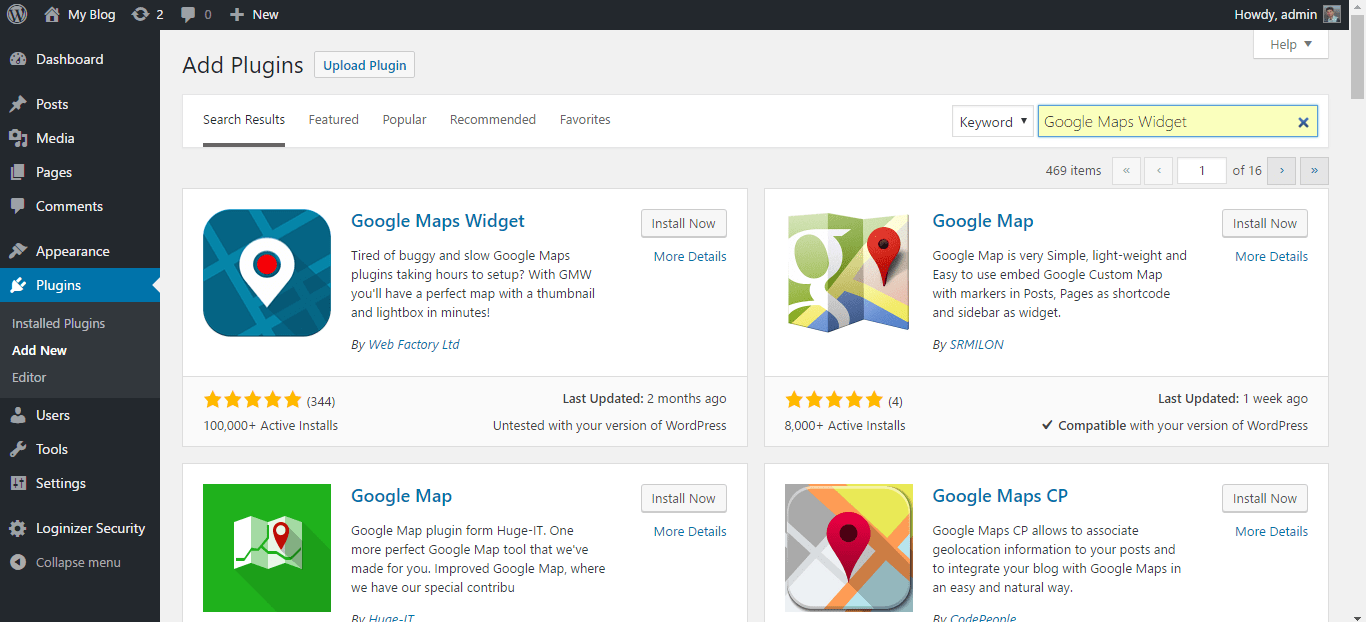
Step 1: The very first thing is installing the plugin itself.
Log into your site, go to Plugins>> Add new, search for google maps widget, hit Install, and then Activate.

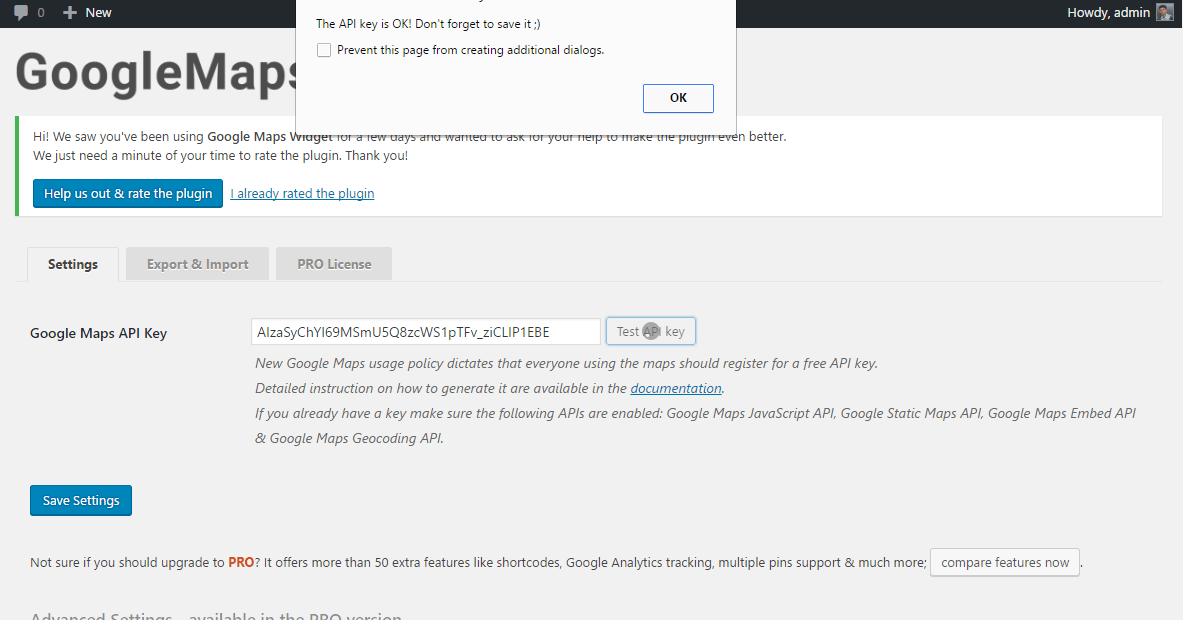
Step 2: Once you install the plugin on your site, you have to enter a Google Maps API key.
You can read this guide for the complete information of how to get Google Maps API.
Step 3: Now go to Settings>> Google Maps Widget and paste the API key here. In order to make sure it is working, you can hit the Test API Key button. And, click Save.

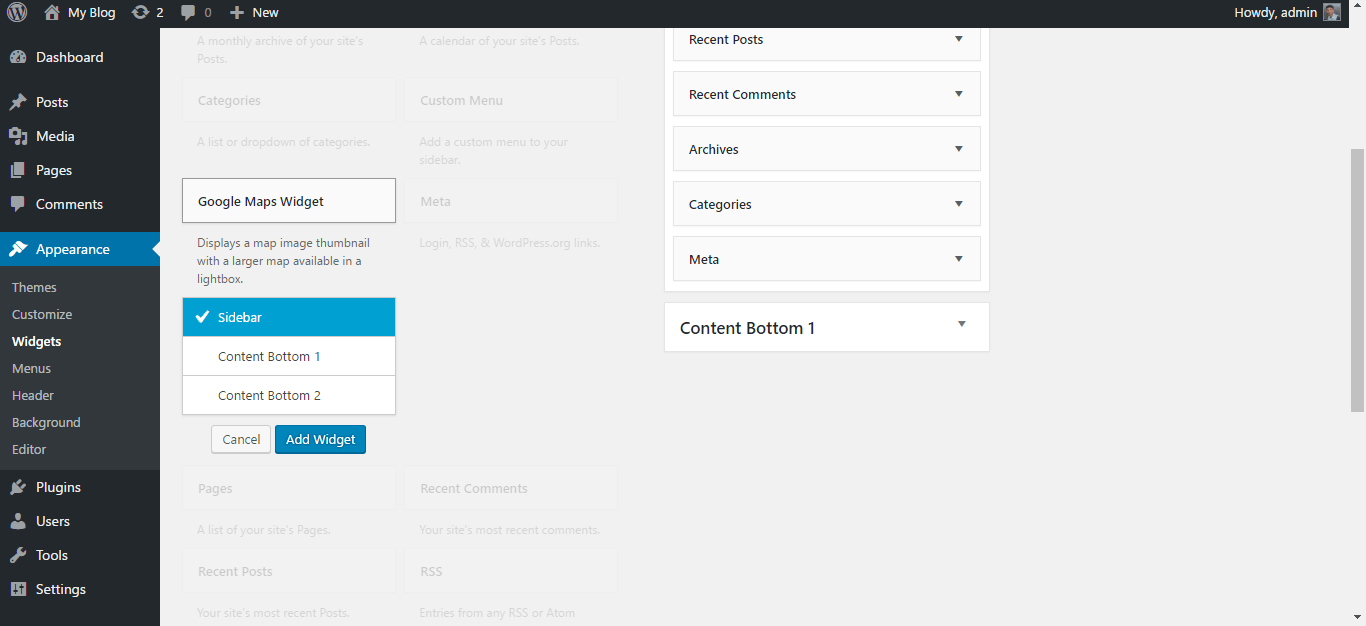
Step 4: You are all set to embed Google Maps. Follow Appearance>> Widgets. Have a look at the left side. Can you see Google Maps Widget there? Click on the same and choose the location.

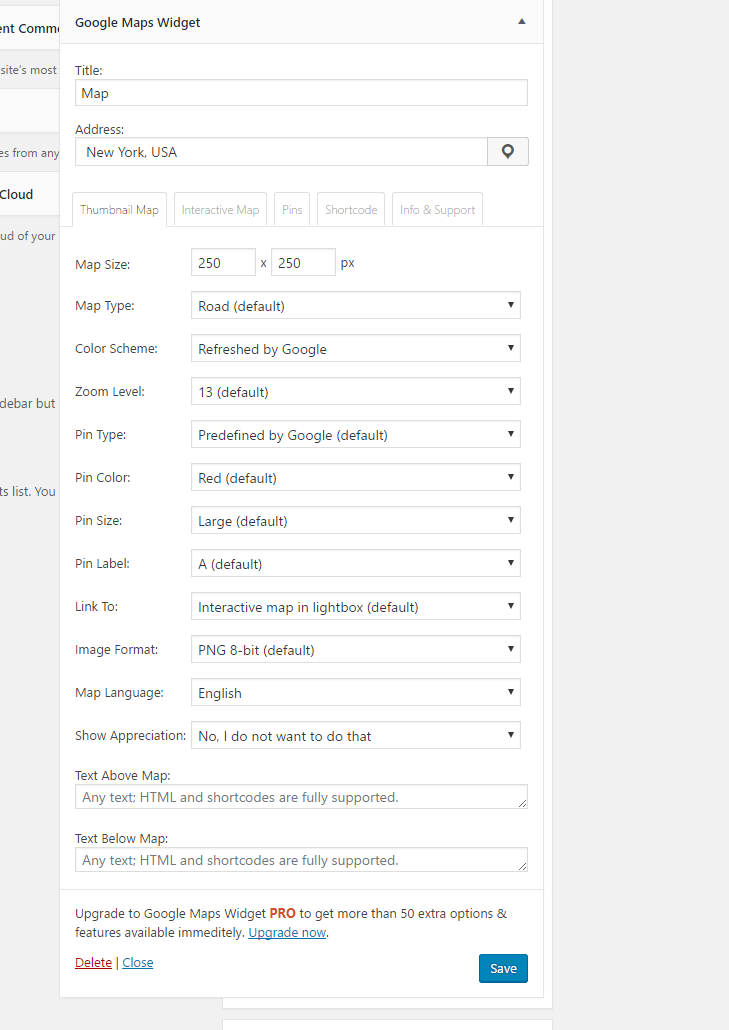
Step 5: You now have to choose the settings. Provide location, choose dimensions, select between thumbnail and interactive maps, grab shortcodes, or do anything you want.

There you go! You can now start seeing Google Maps on your website. Use the shortcode you copied too display Maps wherever you want on the site.
Final Verdict
What do you think?
Given that it is a free plugin, you have nothing to lose. They do limit us from using features like shortcodes on the free version. Still, it is worth a shot.
What are you waiting for? Install it on your site now.


